· 3 min read
Working with Multiple Physical Addresses in Compliance Profiles
Customer Insights - Journeys Compliance Profiles

We recently received a new question about transitioning from Outbound Marketing (OBM) to Real-Time Journeys. In my Content Settings (OBM), I have two custom address lines for two additional physical locations. How should I handle this in Real-Time Journeys?
This is a topic that my colleague and I have discussed extensively. Is there a clear resolution? Let’s take a look!
Customizing the Compliance Profile
The first thing we tested was adding two custom fields to the compliance profile entity. Makes sense, right?
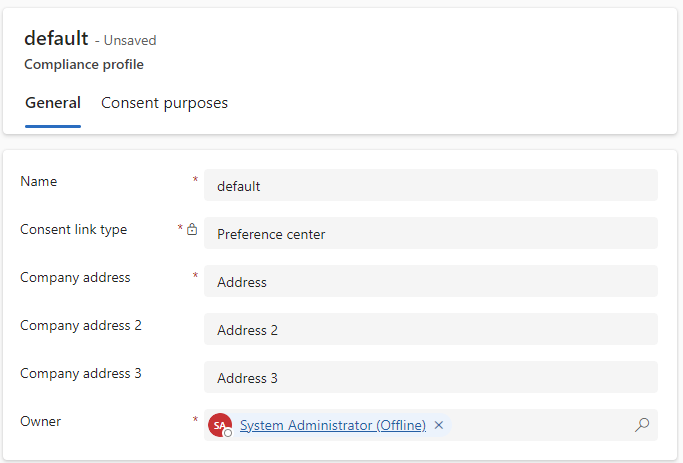
However, take a look at the email—no custom fields! 😭
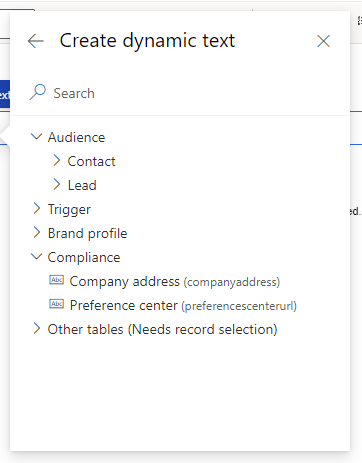
Alright, let’s try the Other tables option.
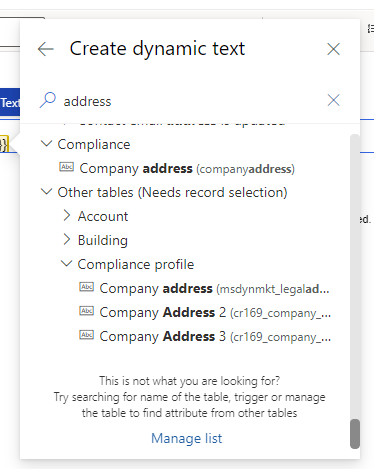
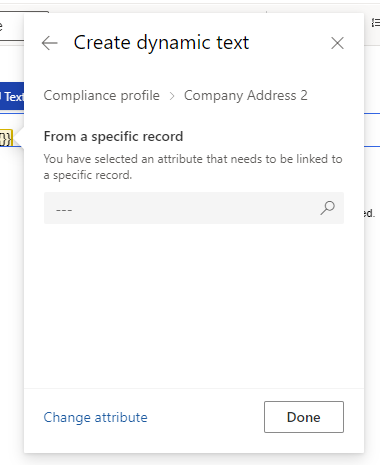
This approach works, but it requires selecting a specific record, which must also be done in the email’s compliance section. This setup could allow for selecting two different compliance profiles, which introduces room for errors—and thus, room for improvement.
Using Brand Profiles
Since customizing the compliance profile isn’t viable, let’s consider another entity we can customize: the brand profile. Following the same idea, we added two custom address fields on the brand profile entity.
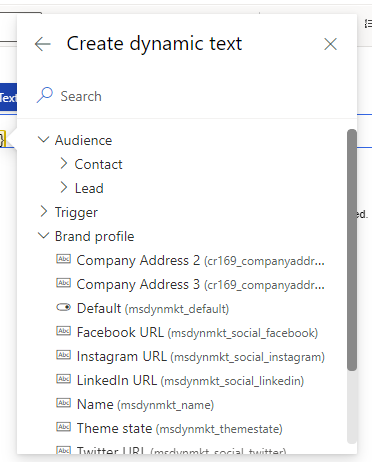
Here we can use the custom fields.
However…
What about the other, semi-required {{CompanyAddress}} field from the compliance profile? While it’s not strictly required, a warning appears if it’s missing. We know we can bypass warnings, but is this approach user-friendly enough?

Content Blocks
Since the {{CompanyAddress}} field only triggers a warning, we could create several protected content blocks for the footer with the physical address hard-coded.
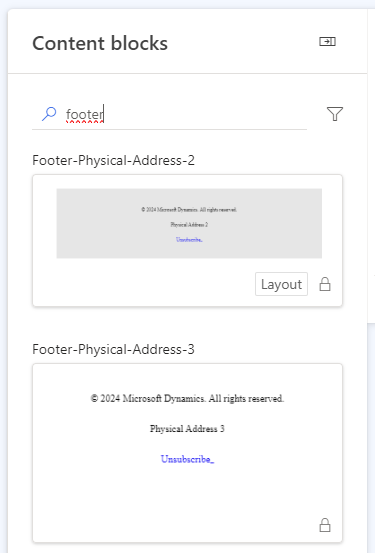
Of course, we could extend these content blocks with a section that includes the {{CompanyAddress}} field, making it hidden on both mobile and desktop. This way, we avoid the error message, which is helpful. However, the section remains visible in the email editor.

If you’re an HTML lover like me, you can also hide the section containing the {{CompanyAddress}} field within the HTML code so it doesn’t appear in the email editor. Check out the below video on how to do this.
Using Multiple Linked Compliance Profiles
This is one of my favorite features in Real-Time Journeys: using multiple linked compliance profiles. I wrote a blog on this feature, including a how-to guide, but it might help in this scenario as well. For each physical address, create a linked compliance profile. No changes are needed in the email itself—just select the appropriate compliance profile, and the {{CompanyAddress}} field will automatically fill with the correct address.
There is one potential drawback, though. If you make updates in the preference center (such as adding an extra topic or a new communication channel), you’ll need to manage multiple preference centers.
Wrap-Up
I explored four ways to manage multiple physical addresses in email marketing, but there’s no clear winner. Consider the experience of the marketing users and discuss the options with them to find what suits them best.
| Idea | Pro | Con |
|---|---|---|
| Customize Compliance Profile | Central place to store the information | Easy to make errors due to record selection; requires customization |
| Customize Brand Profile | Easy to select in email | Warning on {{CompanyAddress}}; requires customization |
| Use Hard-Coded Content Blocks | Easy to drag and drop correct content block | Warning on {{CompanyAddress}} field, but easy to fix |
| Use Multiple Compliance Profiles | Easy to select the correct address | Requires managing multiple preference center pages after changes |