· 5 min read
Using Voucher Codes in Customer Insights – The Fun Part
Use voucher codes in Real Time Marketing, personalize email, and launch journey for seamless execution.
In the previous post we all talked about the ‘technical’ part of using voucher codes in Dynamics Customer Insights. Now we are looking at the fun part, using the voucher codes in Real Time Marketing.
The Solution in Short
- Create a Voucher Code table with a relationship to contacts.
- Create a Real Time Marketing trigger that can be used in a journey.
- Create a Power Automate after this trigger that connects the contact to an available voucher code.
- Create a Real Time Marketing email to get the voucher code to the customer.
- Create a Real Time Marketing journey to combine all things together.
Steps one till three are already covered in the previous post, so now we will focus on steps four and five.
Create a Real Time Marketing Email
When our customers are eligible for a voucher code, we want to make sure that they are aware of the fact that they receive a unique voucher code. Therefore, we will need to email them the voucher code.
Step one – Set-up the Email
Create an email like you are used to in your template. Make sure everything is in place and you have some ‘room’ for your voucher code.
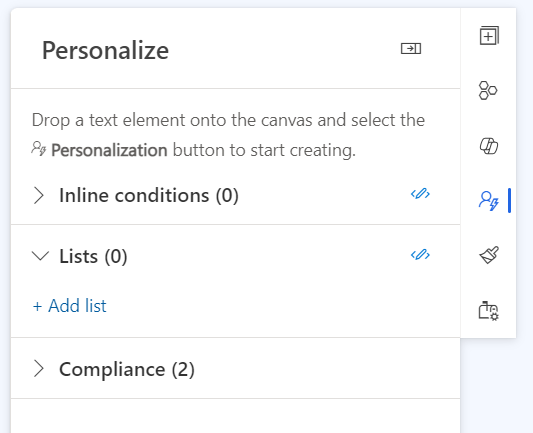
Step two – Set up the Voucher Code
Go to Personalize and open up the List section and create a new list.
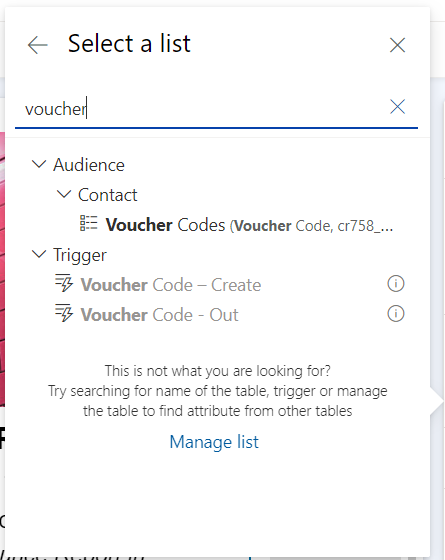
Search for “voucher code” and use the one from the contact entity.
Next up we are going to do three things.
- Set a condition, so we only list voucher codes for this specific campaign
- Set the number of voucher codes, so we only see one
- Select the columns that we want to display in our email
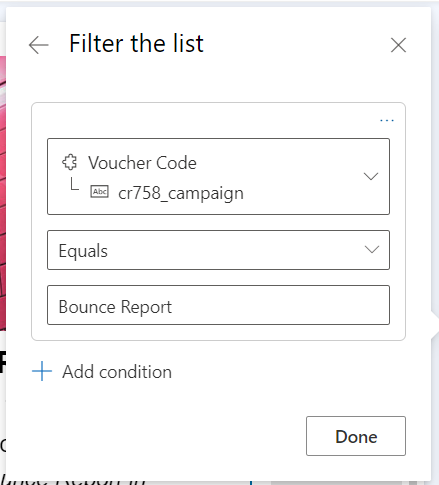
Set a Condition
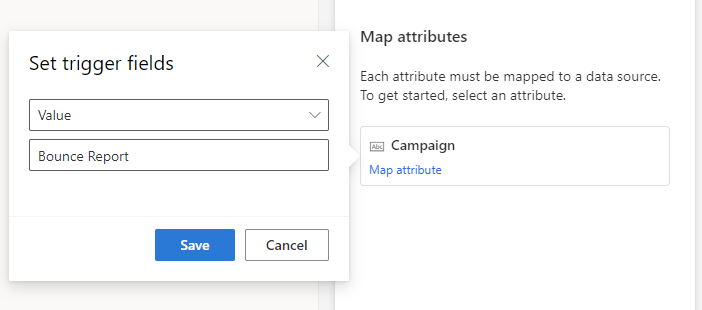
We want to make sure that we only display the voucher codes from the campaign that we are creating this email for. So click on “Add list filter” and set the campaign field as the value you provided in your voucher codes. In this example we will use “Bounce Report”.
Set Number of Voucher Codes
Next up, the number of voucher codes. Since we only give one voucher code to the contact with the Power Automate, we need to make sure that we only see one. So set the Max amount of items to “1” and the Order by to “createdon” and “Descending”. Now we will get the latest voucher code for this campaign.
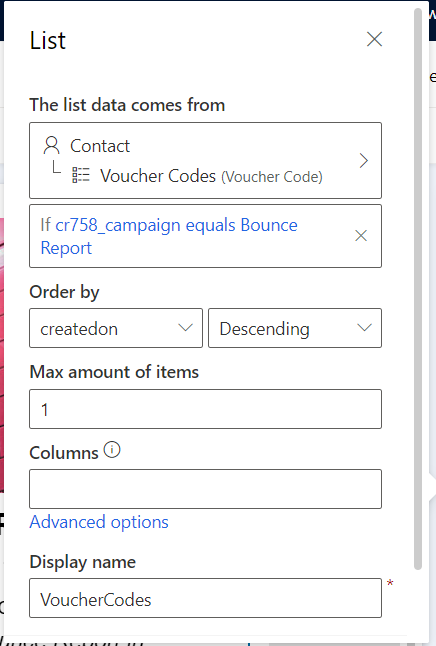
Select the Columns for our Email Content
Last part is to select the columns that we want to use in our Email Content. If you have fields like date and time, you can also set the display settings here. In this case I need both the voucher code and the end date.

And now click “Save & copy”. A new pop-up appears. Click on “Copy”.
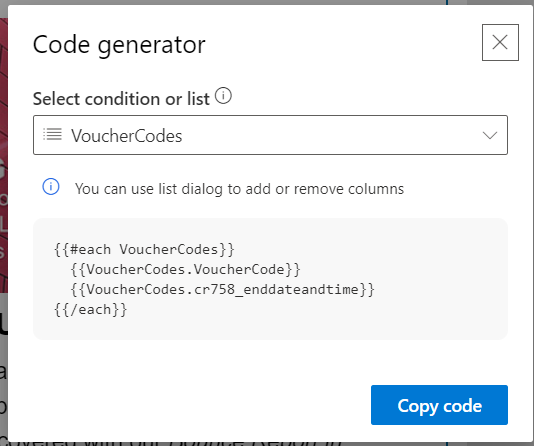
Now you can paste the code in your email and do some additional styling or adding additional content.
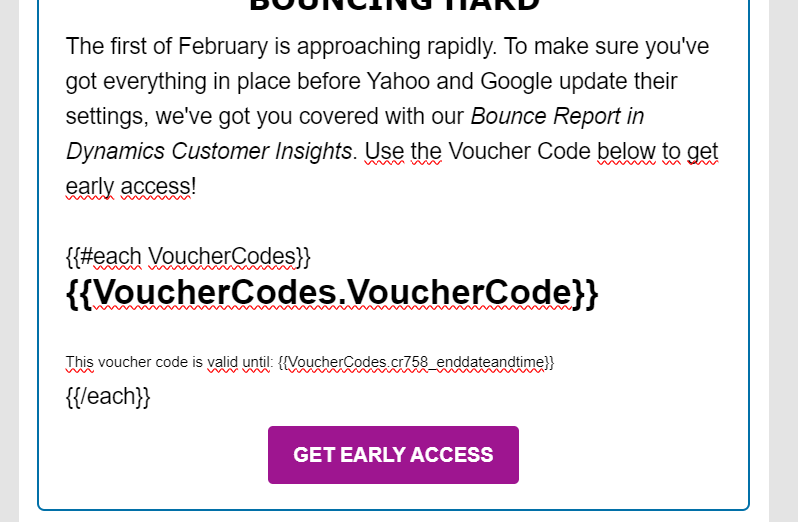
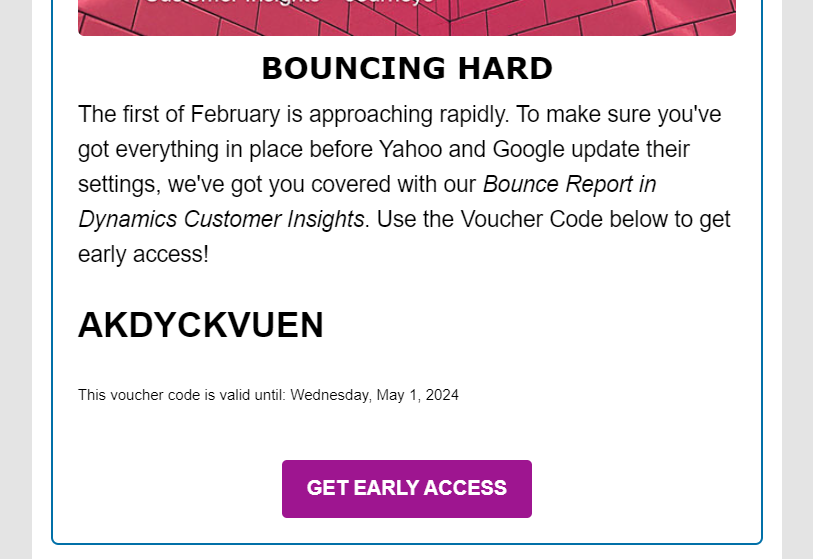
Please make sure that you do check the content in the Preview section by selecting a Contact with an actual voucher code in the “Edit sample data” section. Here you can check your final email.
Step three – Go Live
When everything is in place and you’ve checked the email in Litmus or on your own devices, you are ready to Go Live.
Create a Real Time Marketing Journey
Now all things are coming together. All the effort we put into this, we are now getting were we want to be 😊
Step one – Set-up the Journey
Create a Journey like you wish, using either a Segment or Trigger based Journey. Make sure everything is in place and ‘stop’ where you want to set the Voucher Code to the Contact and sent out the Email.
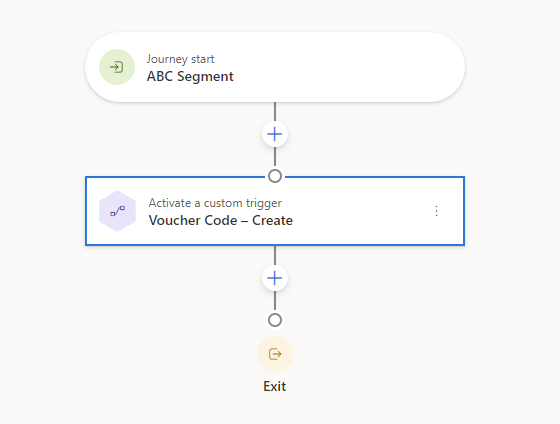
Step two – Adding the Trigger
In the Journey now select “Activate a custom trigger”. Select the Trigger “Voucher Code – Create”.
To make sure we select the correct Voucher Codes for this campaign, we need to set the attribute Campaign to Value “Bounce Report” (as we did in the email).
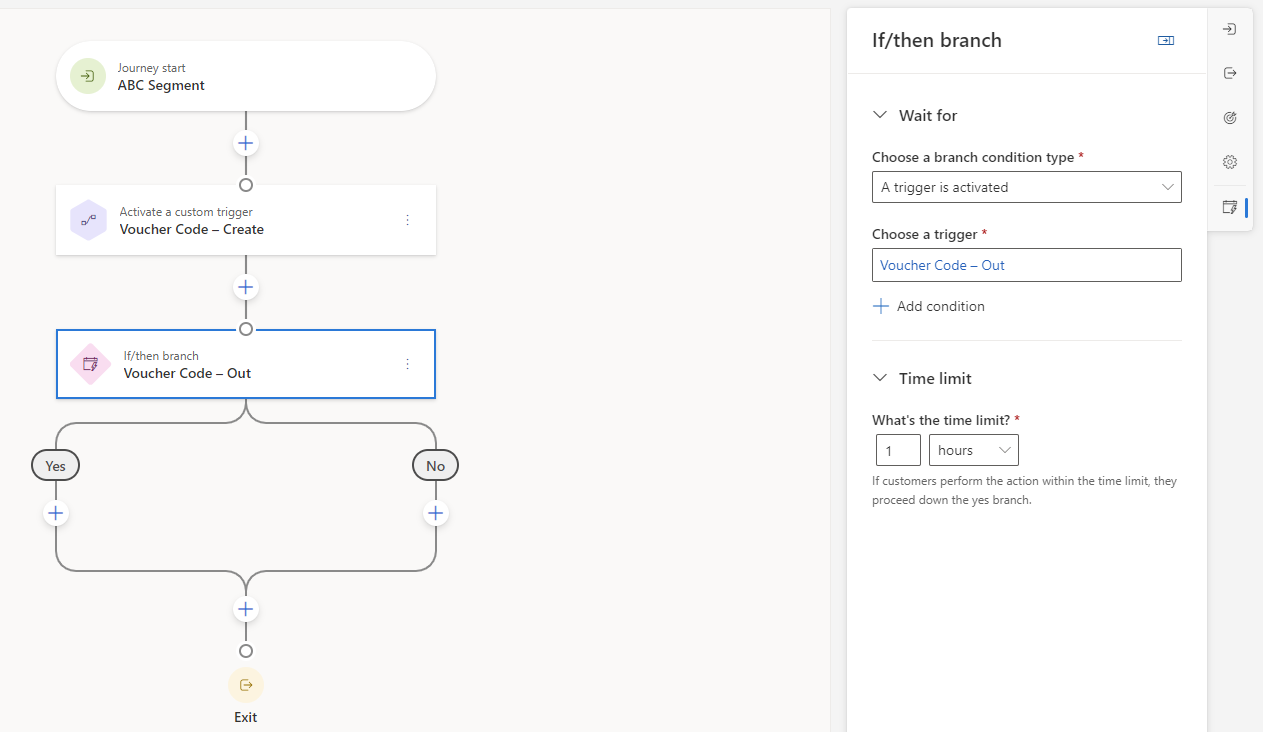
Step three – Adding a Condition
Now the Contact is going to be set to the Voucher Code, we just want to make sure everything worked out so we set a “Wait for trigger”, so that when no Voucher Code is set because of an error, customers don’t receive an email.
Set the trigger to “Voucher Code – Out” and the time limit to one hour (or any other time limit). The Power Automate takes approximately 20 seconds.
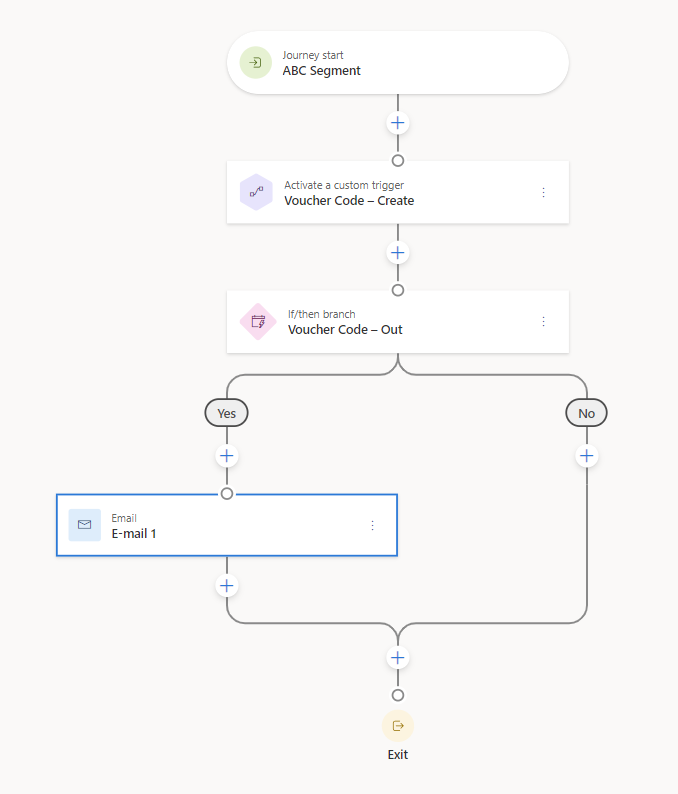
Step four – Adding the Email
When the Condition is met, we want to send out the Email. So add an Email tile and select the Email you created in the previous section.
Step five – Go Live
When you are all set, hit the Publish button and you are good to go!
Some remarks
So we’ve created a list in the email in which we will display only one voucher code. Unfortunately, at the moment, it is not possible to make it easier and just select the attribute voucher code from the trigger Voucher Code - Out and then use that email in the Journey. As declared by Microsoft, you can only use attributes from a trigger in an email when that trigger is the root trigger of the journey.
Off course we could use the trigger Voucher Code – Out as a start of a new journey, but we don’t want to create two journeys for sending out voucher codes. And since this client has several campaigns including voucher codes at the same time, using the List functionality in email is easier and better. Since more Dynamics Customer Insights Users are requesting this functionality, I’ve created an idea where you can vote for here!