· 4 min read
How To - Send a Live Test Send
Sending a Live Test Send in Customer Insights - Journeys
The Test Send functionality in Dynamics Customer Insights - Journeys is a good way to do some basic email testing. However, things like the Preference Page, Online Version, Customer Voice links, Add to Calendar links, and QR codes do not work in this functionality. If you want to take your email testing to the next level, read on to see how to perform a Live Test Send!
Email Scenarios
There are multiple scenarios in Dynamics Customer Insights - Journeys when it comes to emails:
- No personalization
- Personalization from lead/contact entity
- Personalization from trigger
- Personalization with a list
- Conditional content
Each scenario requires a different Live Test Send approach. Let’s take a look at them.
Email #1 - No Personalization
Step 1
Ensure your email content is in Live mode.
Step 2
Create a Custom Trigger with your target entity (either lead or contact) and name it something like “QUICKSTART - Contact” (or Lead). Add no other attributes, and set the trigger to Ready to use mode.

Step 3
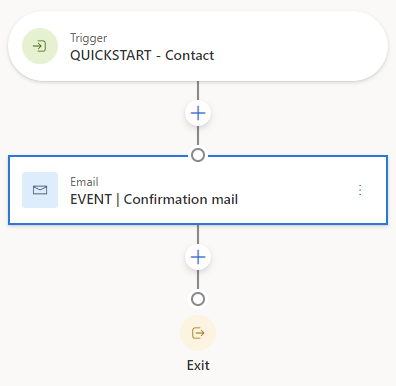
Create a Journey with your QUICKSTART - Contact trigger as the start, and follow it with your email from Step 1. Then, set the Journey to LIVE.
Step 4
Go back to your QUICKSTART - Contact trigger and search for the Contact you want to send the Live Test Send to. Make sure you pick a contact that has the appropriate consent for this email. Hit Test Send, and the journey will start sending your email.
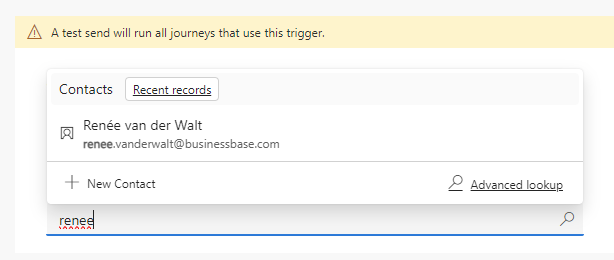
Be aware that the email address of the contact is used to send the email. Always use an email address you have access to. Using this QUICKSTART trigger gives you more flexibility in testing Live emails compared to using a test Segment.
Email #2 - Personalization from Contact/Lead Entity
Use the same steps and QUICKSTART trigger as for an email without personalization. Just ensure that all the personalization fields you have used in the email are filled for the contact you choose in step 4.
Email #3 - Personalization from Trigger
Step 1
Ensure your email content is in Live mode.
Step 2
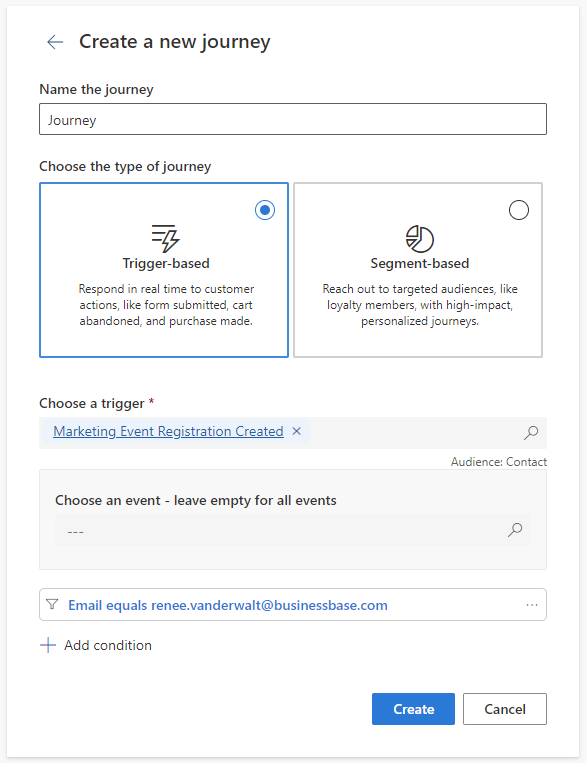
Create a journey that start with the trigger you have used to get your personalization from. Add extra filtering so that the journey is only triggered when the contact/lead matches your test person. The easiest way to do this is by adding a filtering on email address.
Step 3
Perform the action to start the trigger with the contact/lead that holds the same email address as in your filtering.
If, by accident, someone performs the same trigger, the person won’t receive the email, because of the filtering.
Email #4 - Personalization with a List
Use the same steps and QUICKSTART trigger as for an email without personalization. Just ensure that the person you select in step 4 has at least two records that relate to the list items in your personalization so that you can check the content.
Email #5 - Conditional content
Use the same steps and QUICKSTART trigger as for an email without personalization.
To test all the possible variations of your email, make sure you select different contacts/leads in step 4 to see all the possible variations. If you are using segments in your conditional content, check beforehand if the contacts/leads are actually in the respective segment.
An easy way to get an overview of this is to create different test scenario’s, like the example below.
| Test | Conditional block #1 | Conditional block #2 | Conditional block #N |
|---|---|---|---|
| # 1 | Variation #1 | Variation #1 | Variation #1 |
| # 2 | Variation #2 | None | Variation #2 |
| # 3 | Variation #3 | None | None |
Wrap Up
Sending a Live Test Email to yourself as the final test is always a good idea; read in this blog why. Now you know how to send these Live Test Emails to yourself in different email scenarios!