
I’ve been using custom fields in Real-Time Journey forms quite a bit since there’s no built-in way to do it yet! However, I always played it safe by using radio buttons, text fields, and checkboxes. I never attempted to add a custom lookup field—until now.
Recently, I encountered a scenario where I was tempted to build one myself. I wanted a lookup field pointing to a custom entity called ‘Colors’ without having a ‘Color’ field on the contact record. This means the lookup is not available on the contact. Below are my results!
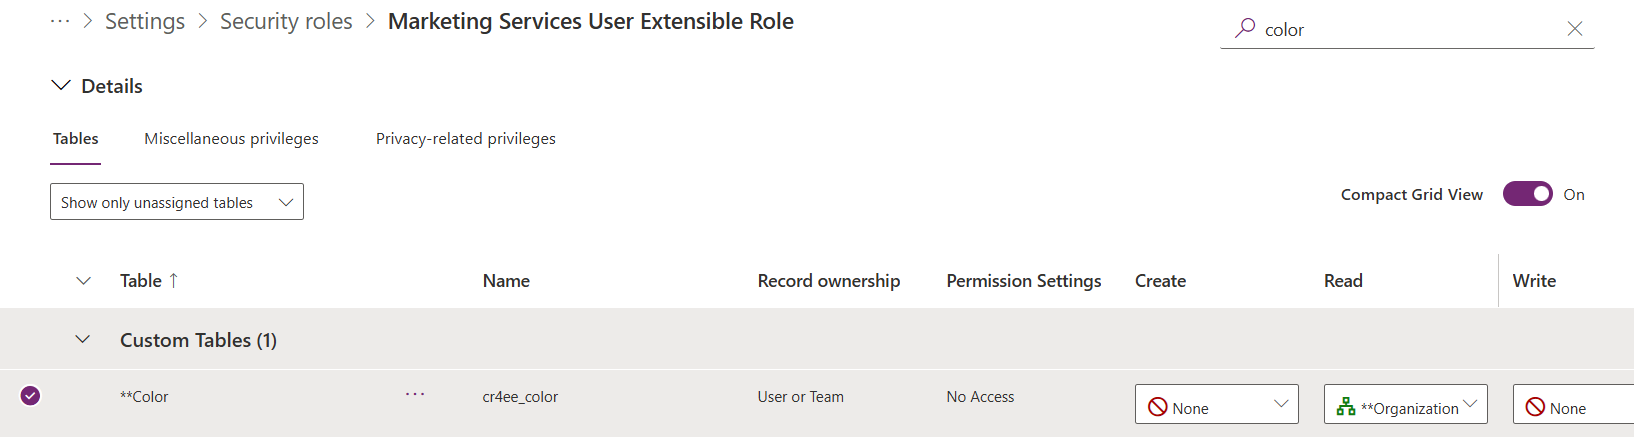
Update Marketing Services User Extensible Role
Since I want (potential) customers to ‘search’ through our lookup entity (Colors), I need to grant the Marketing Services User Extensible Role read rights on this entity.
Building the Form
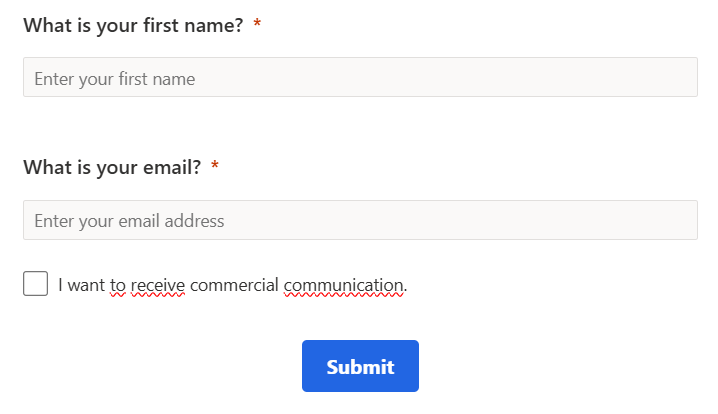
First, I start with a simple form containing:
- First name
- Email address
- Checkbox for opt-in
- Submit button
Next, I add an out-of-the-box lookup field from the contact—Currency. I set the field Make lookup data publicly available to “Yes” and select a filter and attribute name. Then, I open the HTML editor to inspect the generated HTML code.
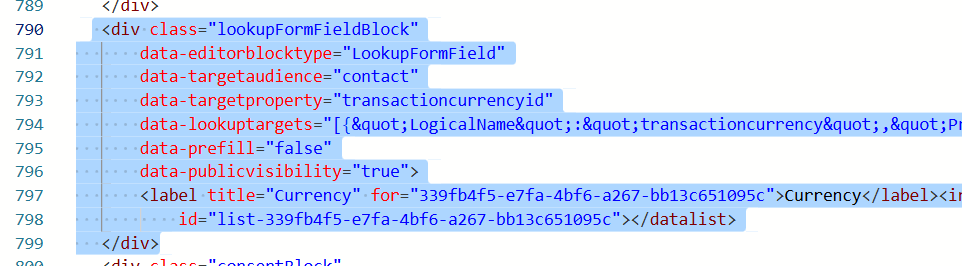
Let’s break down the elements found in the HTML:
| HTML Element | Meaning |
|---|---|
data-editorblocktype="LookupFormField" | Indicates this block contains a lookup field, used for styling |
data-targetaudience="contact" | The target audience is Contact |
data-targetproperty="transactioncurrencyid" | The logical name of the mapped field on the Contact |
data-lookuptargets="..." | Contains the logical name of the Currency entity, the ID of the selected view, and the logical name of the selected attribute |
data-prefill="false" | No prefilling of this field |
data-publicvisibility="true" | The lookup data is publicly available |
label | Holds the label of the input field |
input | The actual input field |
datalist | Holds the list of items selected in the data-lookuptargets view |
Here’s the full code:
<div class="lookupFormFieldBlock"
data-editorblocktype="LookupFormField"
data-targetaudience="contact"
data-targetproperty="transactioncurrencyid"
data-lookuptargets="[{"LogicalName":"transactioncurrency","PrimarySavedQueryId":"c8f16d88-e49c-48dd-af54-a6bd5102c439","PrimaryNameAttribute":"currencysymbol"}]"
data-prefill="false"
data-publicvisibility="true">
<label title="Currency" for="339fb4f5-e7fa-4bf6-a267-bb13c651095c">Currency</label>
<input id="339fb4f5-e7fa-4bf6-a267-bb13c651095c" type="text" name="transactioncurrencyid" placeholder="Currency" title="Currency" list="list-339fb4f5-e7fa-4bf6-a267-bb13c651095c">
<datalist id="list-339fb4f5-e7fa-4bf6-a267-bb13c651095c"></datalist>
</div>Looking closely at the data-lookuptargets values, I see the following:
- Logical Name → The logical name of the currency entity
- PrimarySavedQueryId → The ID of the view selected in the lookup field
- PrimaryNameAttribute → The logical name of the attribute selected in the lookup field
Now, what if I changed these values to match my custom entity?
data-lookuptargets="[{"LogicalName":"cr4ee_color","PrimarySavedQueryId":"14286cac-6fc6-4739-8e91-d073f325e340","PrimaryNameAttribute":"cr4ee_color"}]"Next, I update the label and input values:
<label title="Color" for="339fb4f5-e7fa-4bf6-a267-bb13c651095c">Pick your favorite color</label>
<input id="339fb4f5-e7fa-4bf6-a267-bb13c651095c" type="text" name="color" placeholder="Pick your color" title="Color" list="list-339fb4f5-e7fa-4bf6-a267-bb13c651095c">
<datalist id="list-339fb4f5-e7fa-4bf6-a267-bb13c651095c"></datalist>
Finally, I remove the data-targetproperty from the <div> element, since this field won’t be mapped to the contact. Here’s the final version of the code:
<div class="lookupFormFieldBlock"
data-editorblocktype="LookupFormField"
data-targetaudience="contact"
data-lookuptargets="[{"LogicalName":"cr4ee_color","PrimarySavedQueryId":"14286cac-6fc6-4739-8e91-d073f325e340","PrimaryNameAttribute":"cr4ee_color"}]"
data-prefill="false"
data-publicvisibility="true">
<label title="Color" for="339fb4f5-e7fa-4bf6-a267-bb13c651095c">Pick your favorite color</label>
<input id="339fb4f5-e7fa-4bf6-a267-bb13c651095c" type="text" name="color" placeholder="Pick your color" title="Color" list="list-339fb4f5-e7fa-4bf6-a267-bb13c651095c">
<datalist id="list-339fb4f5-e7fa-4bf6-a267-bb13c651095c"></datalist>
</div>Results
🥁 Drum roll, please, for the lookup field on the form…

And now, for the submitted values…
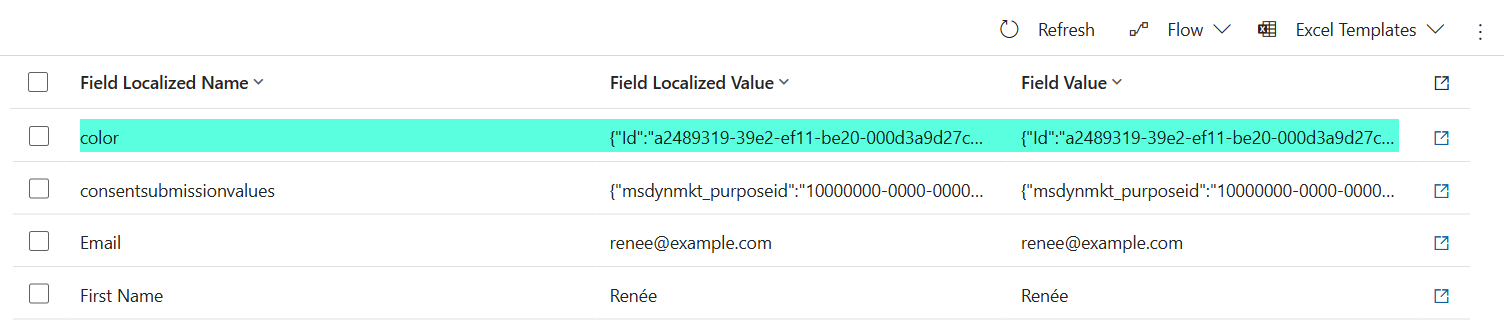
It works!
Wrap-Up
While this feels like a workaround, with the postponed Public Preview of the Custom Fields feature, this solution might be useful in the meantime!
Advice: Test it thoroughly.